
Contents
- 1 Understanding Dog Paw Anatomy and Common Injuries
- 2 Initial Assessment of the Paw Injury
- 3 First Aid Steps for Cut Paws
- 4 Proper Bandaging Techniques
- 5 Monitoring and Follow-up Care
- 6 Prevention of Future Paw Injuries
- 7 Professional Treatment Options
- 8 Home Remedies and Natural Solutions
- 9 Special Considerations for Different Breeds
- 10 10 Tips How to Treat Cut on Dog Paw
- 10.1 1. Assess the Severity of the Cut
- 10.2 2. Clean the Wound Thoroughly
- 10.3 3. Apply Appropriate Antiseptic Solution
- 10.4 4. Use Veterinary-Approved Antibiotic Ointment
- 10.5 5. Apply Proper Bandaging
- 10.6 6. Monitor the Wound Daily
- 10.7 7. Prevent Licking and Chewing
- 10.8 8. Limit Activity During Healing
- 10.9 9. Use Protective Measures During Walks
- 10.10 10. Know When to Seek Professional Help
- 11 How to Treat Cut on Dog Paw: Quick Guide Summary
- 12 FAQ Section
- 12.0.1 Will my dog’s cut paw heal on its own?
- 12.0.2 What ointment do you put on a cut on a dog’s paw?
- 12.0.3 How long does it typically take for a dog’s paw cut to heal?
- 12.0.4 Can I use human antibiotic ointment on my dog’s paw?
- 12.0.5 How often should I change my dog’s paw bandage?
- 12.0.6 What are signs that my dog’s paw cut is infected?
- 12.0.7 Is it safe to let my dog lick their paw cut?
- 12.0.8 Can I walk my dog with a cut paw?
- 13 Conclusion
How to Treat Cut on Dog Paw
Your dog needs emergency veterinary care if he or she sustains an injury, such as a cut on the paw. Paw injuries can have a major influence on your dog’s movement, comfort, and general health because it is one of its most used areas of the body.
Assessing the extent of the injury, administering first aid as needed, and knowing when to seek veterinary assistance are all part of treating a cut on a dog’s paw. In this detailed guide, you will find all the information you need to diagnose and treat paw injuries, as well as ways to keep your pet’s paws safe from harm in the future and advice from experts on how to keep their paws healthy.
This article will give you the confidence you need to deal with paw injuries efficiently, whether they’re small scrapes or serious lacerations, and make sure your pet gets well quickly.
Understanding Dog Paw Anatomy and Common Injuries
Basic Paw Structure
The dog’s paw is a complex structure consisting of several key components:
- Digital pads (toe pads)
- Metacarpal/metatarsal pad (main pad)
- Carpal pad (wrist pad)
- Dewclaws
- Nails
- Interdigital spaces
Types of Paw Injuries
Different types of cuts and injuries can affect your dog’s paw:
| Injury Type | Description | Common Causes | Typical Severity |
|---|---|---|---|
| Superficial Scrapes | Surface-level abrasions | Rough terrain, concrete | Mild |
| Puncture Wounds | Deep, narrow injuries | Glass, thorns, nails | Moderate to Severe |
| Lacerations | Clean cuts or tears | Sharp objects, metal edges | Moderate to Severe |
| Pad Burns | Thermal or chemical burns | Hot pavement, de-icing agents | Moderate to Severe |
| Interdigital Cuts | Cuts between toes | Ice, sharp debris | Mild to Moderate |
Initial Assessment of the Paw Injury
Severity Check
When examining your dog’s paw injury, consider these factors:
- Depth of the wound
- Amount of bleeding
- Location on the paw
- Presence of foreign objects
- Signs of infection
Warning Signs Requiring Immediate Veterinary Care
| Sign | Description | Action Required |
|---|---|---|
| Heavy Bleeding | Blood that doesn’t stop after 10-15 minutes of pressure | Immediate vet visit |
| Exposed Bone/Tissue | Deep wounds showing internal structures | Emergency care |
| Foreign Objects | Embedded items that can’t be easily removed | Professional removal |
| Signs of Infection | Swelling, pus, excessive redness | Veterinary assessment |
| Limping | Refusing to put weight on the paw | Medical evaluation |
First Aid Steps for Cut Paws
Cleaning the Wound
- Gently restrain your dog
- Remove visible debris
- Clean with sterile saline solution
- Pat dry with clean gauze
Disinfection Protocol
| Step | Product | Application Method | Duration |
|---|---|---|---|
| Initial Cleansing | Sterile Saline | Gentle irrigation | 1-2 minutes |
| Antiseptic Application | Chlorhexidine (0.05%) | Careful swabbing | 30 seconds |
| Secondary Cleansing | Clean water | Light rinsing | 30 seconds |
| Drying | Sterile gauze | Gentle patting | Until dry |
Applying First Aid Products
- Antibiotic ointment (veterinary approved)
- Non-stick gauze padding
- Self-adhering bandage
- Protective boot (if available)
Proper Bandaging Techniques
Materials Needed
- Non-stick absorbent padding
- Gauze wrap
- Self-adhering bandage
- Medical tape
- Protective outer layer
Step-by-Step Bandaging Guide
| Layer | Purpose | Material | Application Tips |
|---|---|---|---|
| Primary | Wound contact | Non-stick pad | Apply directly to wound |
| Secondary | Absorption | Gauze wrap | Wrap with medium pressure |
| Tertiary | Protection | Self-adhering bandage | Secure but not tight |
| Outer | Waterproofing | Protective wrap | Weather-appropriate |
Common Bandaging Mistakes to Avoid
- Wrapping too tightly
- Leaving bandage on too long
- Not checking for proper circulation
- Incorrect layering
- Using inappropriate materials
Monitoring and Follow-up Care
Daily Wound Check Protocol
| Time | Action | What to Look For |
|---|---|---|
| Morning | Visual inspection | Bleeding, discharge |
| Afternoon | Bandage check | Slipping, wetness |
| Evening | Full assessment | Healing progress |
| Before bed | Comfort check | Pain signs |
Signs of Proper Healing
- Decreased swelling
- Reduced redness
- Formation of healthy scab
- Return to normal walking
- Improved comfort level
Red Flags During Recovery
- Increased pain
- Worsening swelling
- Discharge changes
- Fever
- Behavioral changes
Prevention of Future Paw Injuries
Environmental Safety Measures
| Season | Hazard | Preventive Measure |
|---|---|---|
| Summer | Hot pavement | Walk during cooler hours |
| Winter | Ice and salt | Use paw protection |
| Spring | Sharp objects | Check walking areas |
| Fall | Hidden debris | Regular path cleaning |
Protective Equipment
- Dog boots
- Paw wax
- Protective sprays
- Weather-appropriate gear
Regular Paw Maintenance
- Weekly pad checks
- Nail trimming
- Fur trimming
- Moisturizing routine
Professional Treatment Options
When to Seek Veterinary Care
| Condition | Timeframe | Treatment Level |
|---|---|---|
| Deep cuts | Immediate | Emergency |
| Infected wounds | Within 24 hours | Urgent |
| Chronic issues | Within week | Regular |
| Minor cuts | Monitor 48 hours | Home care |
Available Medical Treatments
- Surgical repair
- Antibiotic therapy
- Laser therapy
- Physical therapy
- Advanced wound care
Home Remedies and Natural Solutions
Safe Natural Treatments
| Remedy | Purpose | Application |
|---|---|---|
| Coconut oil | Moisturizing | Topical |
| Aloe vera | Soothing | Gel form |
| Calendula | Healing | Diluted tincture |
| Epsom salt | Cleaning | Soaking solution |
DIY Paw Soaks
- Betadine solution
- Chamomile tea
- Salt water
- Herbal infusions
Special Considerations for Different Breeds
Breed-Specific Concerns
| Breed Type | Common Issues | Special Care Needs |
|---|---|---|
| Large breeds | Pressure sores | Extra padding |
| Small breeds | Delicate pads | Gentle products |
| Working dogs | Frequent injuries | Preventive care |
| Sporting breeds | Activity-related cuts | Regular checks |
Age-Related Factors
- Puppy paw sensitivity
- Senior dog mobility
- Athletic dog requirements
- Seasonal adjustments
10 Tips How to Treat Cut on Dog Paw
1. Assess the Severity of the Cut
Find out how deep and severe the cut is on your dog’s paw before you do anything. Check the cut for signs of infection, such as bleeding, debris, or foreign objects. Deeper wounds may reveal underlying tissue, while superficial cuts look like abrasions on the skin’s surface. Get your pet to the doctor right away if you see any signs of internal hemorrhage, serious cuts, or exposed bone. Remember that dogs in pain may be more resistant to examination, so take it easy and think about getting someone to hold your pet if needed.
2. Clean the Wound Thoroughly
In order to avoid infection, clean the wound correctly once you have evaluated it. To remove any debris or grime, use warm water or a sterile saline solution. Hydrogen peroxide can hinder healing and harm good tissue, therefore it’s best to avoid using it. Use clean gauze or paper towels to gently pat the region surrounding the incision to remove any loose debris. To gently remove foreign objects or obstinate material, use tweezers that have been sanitized with alcohol. However, cease immediately if your dog exhibits signs of extreme discomfort or resistance.
3. Apply Appropriate Antiseptic Solution
Following the cleaning, apply a 0.05% chlorhexidine or other dog-safe antiseptic solution. Bacteria can be killed in this way without harming the wound. To keep your dog healthy, don’t give them human antiseptics that contain alcohol or tea tree oil. To prevent introducing bacteria into the wound, apply the solution delicately using sterile gauze or cotton balls, starting from the middle of the cut and working your way outward. Pat dry after 30 seconds of letting the antiseptic rest.
4. Use Veterinary-Approved Antibiotic Ointment
Use a thin coating of veterinary-approved antibiotic ointment to prevent infection and improve healing. Human antibiotic creams containing hydrocortisone or other steroids should never be used unless your veterinarian specially prescribes them. The ointment forms a protective barrier and delivers antibacterial agents to the wound. Use an E-collar to prevent your dog from licking the medication off.
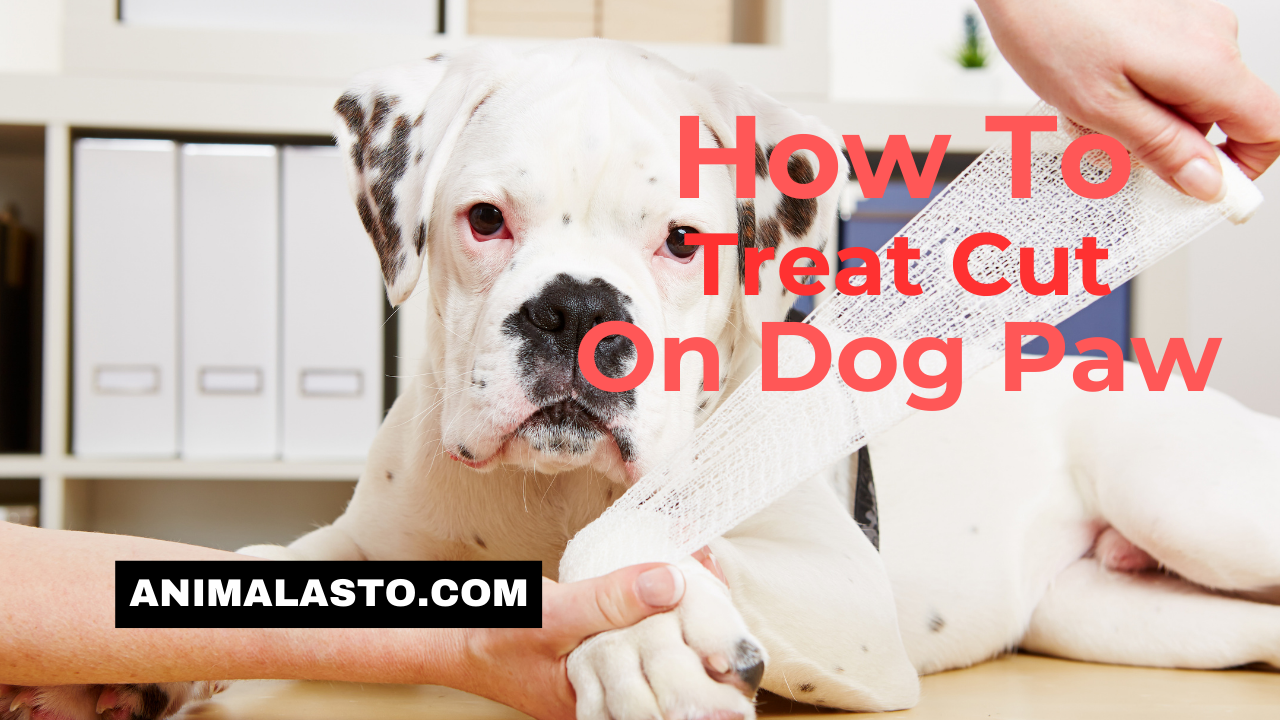
5. Apply Proper Bandaging
For the best protection, use a three-layer bandage system: a non-stick pad on the cut, gauze for padding and absorption, and self-adhering veterinary wrap (not too tight) to secure everything. Be careful the bandage doesn’t restrict blood flow; you should be able to slide two fingers under it. If the toes are swollen or cold, it could be a sign that the bandage is too tight.
6. Monitor the Wound Daily
Check the wound and replace bandages at least once a day, or more frequently if they become damp or filthy. Look for infection symptoms such as increased redness, swelling, warmth, or discharge. Examine your dog’s behavior for signs of pain or discomfort, such as excessive licking, limping, or a refusal to place weight on the affected paw. Keep a record of any changes in the wound’s appearance to track healing process.
7. Prevent Licking and Chewing
Although it’s in the dog’s nature to lick wounds, doing so can actually spread bacteria and hinder the healing process. Put your dog in a protective boot or an E-collar that is big enough to keep him from getting to the cut. Shoes should be both watertight and breathable. Take the boot off your foot at least twice a day to check on any problems and let the wound air out.
8. Limit Activity During Healing
Restrict your dog’s activity while the cut heals to prevent reopening the wound or causing further injury. Keep walks short and avoid rough terrain, wet areas, or places with potential hazards. Consider carrying small dogs over rough surfaces and use a leash to prevent running or jumping. Indoor play should be gentle and supervised to avoid aggravating the injury.
9. Use Protective Measures During Walks
When walks are necessary, protect the bandaged paw with a waterproof boot or plastic covering. This prevents contamination and keeps the bandage dry. In wet conditions, consider using a waterproof sock underneath the protective boot for extra protection. Remove all protective gear once inside to allow the wound to breathe, checking for any signs of moisture or debris that may have entered during the walk.
10. Know When to Seek Professional Help
While minor cuts can be treated at home, certain situations require veterinary attention. Seek professional help if you notice:
- Cuts deeper than a surface scratch
- Bleeding that doesn’t stop after 10-15 minutes of pressure
- Signs of infection (pus, foul odor, increased swelling)
- Limping that persists more than 24 hours
- Cuts that show no improvement after 2-3 days of home treatment
- Signs of fever or lethargy
- Cuts near nail beds or between toes
Ensure that your veterinarian’s contact information is easily accessible and do not hesitate to reach out if you are uncertain about the severity of the laceration or the efficacy of your home treatment. Timely expert intervention can avert minor injuries from escalating into severe complications.
How to Treat Cut on Dog Paw: Quick Guide Summary
When your dog suffers a paw cut, prompt and proper treatment is essential for a speedy recovery. Here’s a comprehensive summary of the key points to remember when treating a cut on your dog’s paw:
Initial Assessment and First Aid
- Examine the cut carefully to determine severity
- Look for active bleeding, debris, or embedded objects
- Clean with sterile saline solution or warm water
- Avoid hydrogen peroxide as it can damage tissue
- Apply dog-safe antiseptic (like 0.05% chlorhexidine)
- Use veterinary-approved antibiotic ointment
Proper Bandaging and Care
- Create a three-layer bandaging system:
- Non-stick pad directly on wound
- Gauze wrap for cushioning
- Self-adhering wrap for protection
- Check bandage isn’t too tight (should fit two fingers underneath)
- Change bandages daily or when soiled
- Keep the wound clean and dry
- Monitor for signs of infection
Important Warning Signs
Seek veterinary care immediately if you notice:
- Deep cuts or heavy bleeding
- Exposed bone or tissue
- Signs of infection (swelling, pus, odor)
- Persistent limping
- Fever or lethargy
Prevention and Protection
- Use protective boots during walks
- Avoid rough terrain while healing
- Keep walks short and controlled
- Prevent licking using E-collar if necessary
- Regular paw maintenance to prevent future injuries
Home Care Tips
- Limit activity during healing
- Keep first aid supplies ready
- Monitor wound daily
- Keep bandages dry
- Allow wound to breathe when safe
- Document healing progress
Recovery Guidelines
- Minor cuts typically heal in 1-2 weeks
- Deeper cuts may take 3-4 weeks
- Follow veterinary advice for activity restrictions
- Return to normal activity gradually
- Watch for signs of re-injury
Remember that while minor cuts can be treated at home, any serious injury requires professional veterinary care. When in doubt, always consult your veterinarian to ensure proper treatment and avoid complications. Keep emergency contact information readily available and maintain a well-stocked pet first aid kit for quick response to injuries.
FAQ Section
Will my dog’s cut paw heal on its own?
While minor superficial cuts may heal, untreated paw injuries can cause infection and problems. Assess the wound, administer first aid, and monitor healing. Deep cuts, significant bleeding, or infection require rapid veterinarian treatment. Healing is faster and safer with proper therapy.
What ointment do you put on a cut on a dog’s paw?
Neosporin without painkillers or Bacitracin are veterinary-approved antibacterial ointments. Avoid zinc oxide and hydrocortisone-containing human drugs. Apply a thin coating after wound cleansing. Ask your vet for prescription-strength therapy. Never let your dog lick the ointment.
How long does it typically take for a dog’s paw cut to heal?
Most minor cuts heal within 1-2 weeks with proper care. However, deeper cuts may take 3-4 weeks or longer, depending on the severity and location of the injury.
Can I use human antibiotic ointment on my dog’s paw?
While some human antibiotic ointments are safe for dogs, it’s best to use veterinary-approved products. Never use products containing zinc oxide or hydrocortisone without veterinary approval.
How often should I change my dog’s paw bandage?
Bandages should typically be changed daily or whenever they become wet or soiled. Check with your veterinarian for specific recommendations based on your dog’s injury.
What are signs that my dog’s paw cut is infected?
Signs of infection include increased redness, swelling, warmth, pus or unusual discharge, foul odor, and increased pain or sensitivity.
Is it safe to let my dog lick their paw cut?
No, dogs should be prevented from licking their wounds as this can introduce bacteria and slow healing. Use an E-collar or protective boot if necessary.
Can I walk my dog with a cut paw?
Limited walking is recommended until the cut heals. Use protective boots for necessary potty breaks and follow your veterinarian’s exercise restrictions.
Conclusion
The key to effectively treating a cut on your dog’s paw is to act quickly, use correct first aid procedures, and provide the right follow-up treatment. You can help your dog recover quickly from paw injuries and be comfortable by following the detailed instructions in this article.
Prevention is usually preferable to treatment, so take precautions and keep up with your normal paw care regimen to lessen the likelihood of injuries. Preventing and treating paw injuries while allowing your dog to continue an active and healthy lifestyle is within your reach with the right information and planning.
External Resources and References:
- American Veterinary Medical Association (AVMA) – [www.avma.org/pet-care/dog-first-aid]
- American Kennel Club Pet First Aid Guide – [www.akc.org/expert-advice/health/dog-first-aid-kit]
- Veterinary Partner – Clinical Resources – [www.veterinarypartner.com]
- PetMD Dog Care Center – [www.petmd.com/dog/care]
- World Small Animal Veterinary Association – [www.wsava.org]